Positive Awning Lock for A&E Awnings
(Click on any picture for a larger view)
Last updated 04/18/03
 There
are two things that prevent the A&E awning from unrolling and
billowing
out while going down the highway. The primary thing is the
factory
locking pawl that is located in the right end cap of the awning.
It is my understanding that A&E has redesigned this locking
mechanism
but on the earlier awnings, this consists of an aluminum disk mounted
to
the center shaft of the awning with depressions around its perimeter
and
a pawl that engages those depressions. The other thing that
prevents
the awning from unrolling is the tension on the springs located in both
ends of the awning tube. Notice that the arms being locked
against
the rig will in no way prevent the awning from unrolling in the
wind!
The awning WILL still unroll with the arms locked tight against the
rig! If your locking pawl is not working properly, all of the
parts to repair it used to be available very inexpensively from www.marksrv.com
He might still have some in stock but you might end up having to
convert
to the new mechanism. I have not seen the new locking mechanism
so
I can't comment if that is better or not but I am told the new
mechanism
will replace the old. Again, Mark's RV would be the one I would
ask.
It would take a while to convince me that I still didn't need the lock
described below.
There
are two things that prevent the A&E awning from unrolling and
billowing
out while going down the highway. The primary thing is the
factory
locking pawl that is located in the right end cap of the awning.
It is my understanding that A&E has redesigned this locking
mechanism
but on the earlier awnings, this consists of an aluminum disk mounted
to
the center shaft of the awning with depressions around its perimeter
and
a pawl that engages those depressions. The other thing that
prevents
the awning from unrolling is the tension on the springs located in both
ends of the awning tube. Notice that the arms being locked
against
the rig will in no way prevent the awning from unrolling in the
wind!
The awning WILL still unroll with the arms locked tight against the
rig! If your locking pawl is not working properly, all of the
parts to repair it used to be available very inexpensively from www.marksrv.com
He might still have some in stock but you might end up having to
convert
to the new mechanism. I have not seen the new locking mechanism
so
I can't comment if that is better or not but I am told the new
mechanism
will replace the old. Again, Mark's RV would be the one I would
ask.
It would take a while to convince me that I still didn't need the lock
described below.
In addition to the factory lock and the spring tension, there are
several
after-market devices available to help prevent the unintentional
unrolling.
Some of these seem better than others but this article will address how
to very inexpensively build one yourself that will clearly do the job
and
requires no drilling or other permanent modifications to the awning or
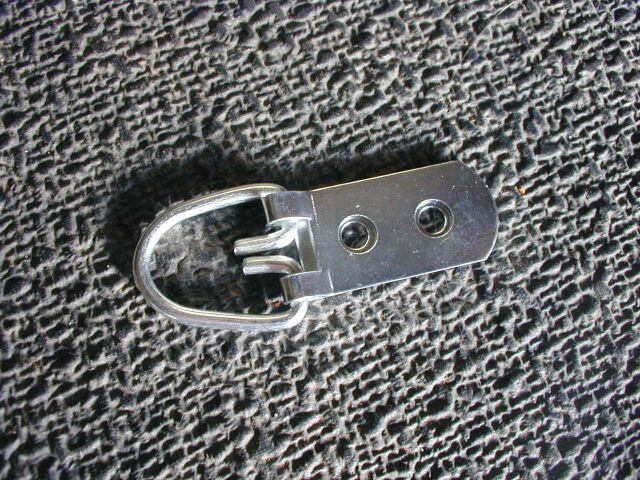
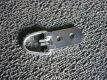
your rig. To accomplish this, you will need a heavy-duty picture
hanger, a screen door catch spring, a stainless steel hose clamp, a
couple
of S hooks and 6 feet of chain for each end of the awning. All of
these parts are available at most Home Depot or Lowe's stores.
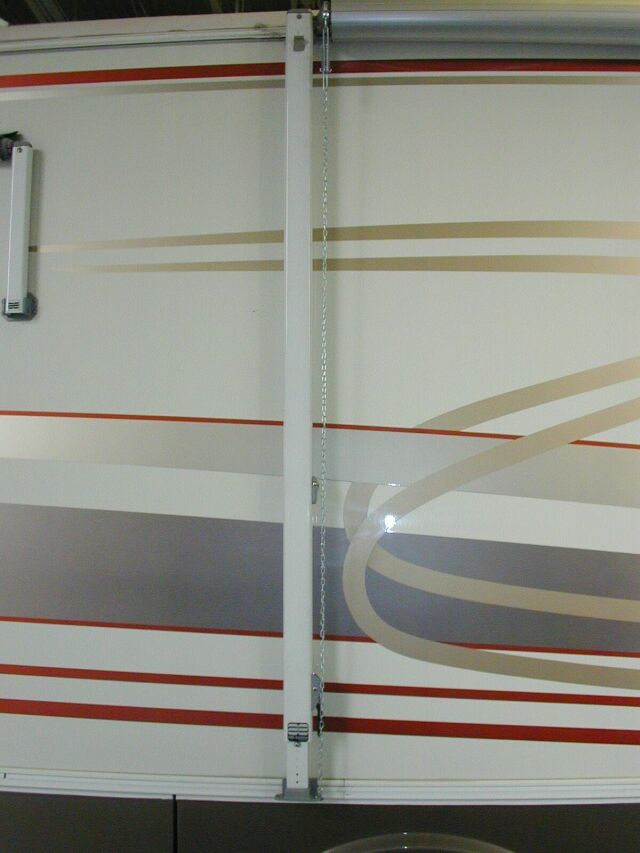
Although
it sounds a bit like a "Rube Goldburg" setup, the picture shows that it
looks very neat and clean on the rig and performs very well. In
addition,
I have had several very positive comments on it. The picture
hanger
is simply clamped to the end cap on the awning using the stainless hose
clamp and the door stop spring goes between the ring on the hanger and
the foot of the vertical brace for the awning. The whole lock can
be installed or removed from the ground and it is impossible for the
awning
to open with it in place. The installation was very
straightforward.
INSTALLATION
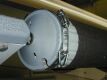 First,
mark the rivet that holds on the end cap that is on the outside when
the
awning is in the up and locked position. This is so you will know
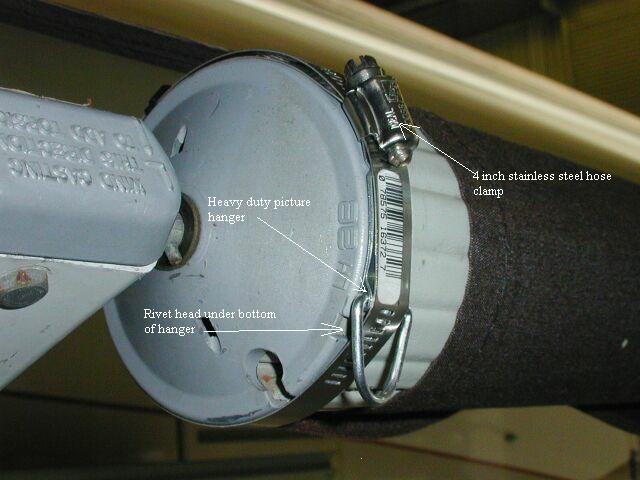
where to install the picture hanger in the next step. Then open
the
awning and clamp the heavy duty picture hanger to the end cap using the
stainless steel clamp as shown in the second picture. The hanger
is placed with its bottom end just above the head of the outside rivet
that you marked earlier. This prevents it from slipping around
the
end cap when the spring pulls down on it. Tightening the
stainless
steel hose clamp forms the tab on the hanger around the curvature of
the
end cap. After the clamp is tightened, use a screwdriver and bend
the hanger away from the clamp enough to allow the S hook to go through
the opening.
First,
mark the rivet that holds on the end cap that is on the outside when
the
awning is in the up and locked position. This is so you will know
where to install the picture hanger in the next step. Then open
the
awning and clamp the heavy duty picture hanger to the end cap using the
stainless steel clamp as shown in the second picture. The hanger
is placed with its bottom end just above the head of the outside rivet
that you marked earlier. This prevents it from slipping around
the
end cap when the spring pulls down on it. Tightening the
stainless
steel hose clamp forms the tab on the hanger around the curvature of
the
end cap. After the clamp is tightened, use a screwdriver and bend
the hanger away from the clamp enough to allow the S hook to go through
the opening.

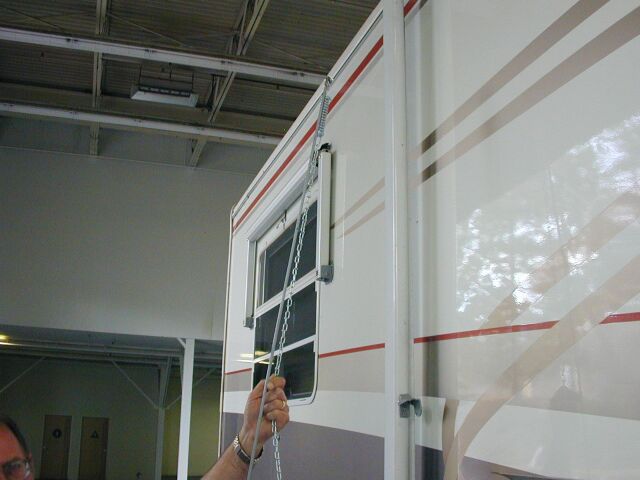
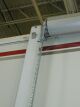
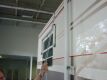 This
is how the spring assembly hooks to the hanger. In the first
picture,
the awning is in the down position for clarity. The spring is
normally
removed and installed with the awning in the rolled up position.
As shown in the second picture, the spring is easily installed from the
ground by hooking the S hook over the top of the awning rod and holding
it in place on the rod by pulling down on the chain while you raise it
and hook it on the picture hanger.
This
is how the spring assembly hooks to the hanger. In the first
picture,
the awning is in the down position for clarity. The spring is
normally
removed and installed with the awning in the rolled up position.
As shown in the second picture, the spring is easily installed from the
ground by hooking the S hook over the top of the awning rod and holding
it in place on the rod by pulling down on the chain while you raise it
and hook it on the picture hanger.
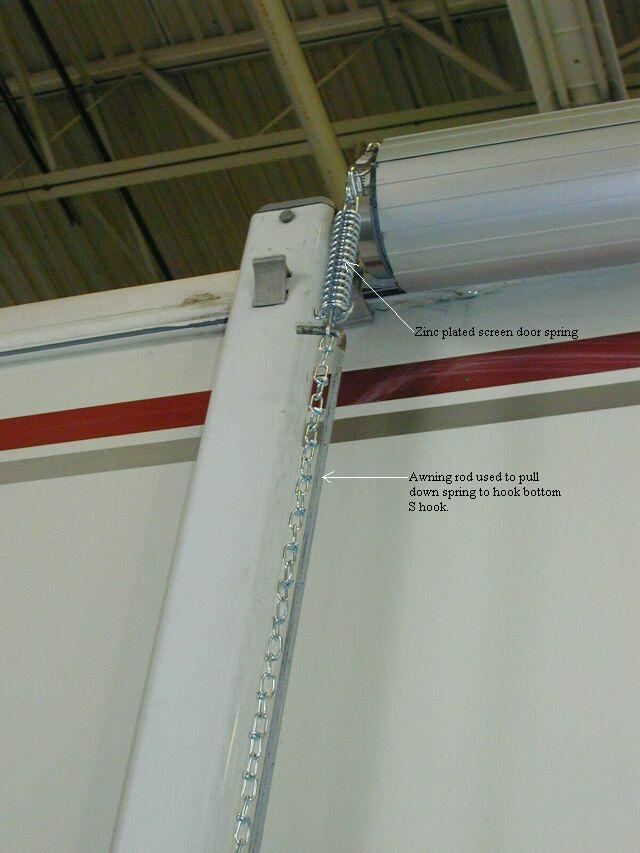
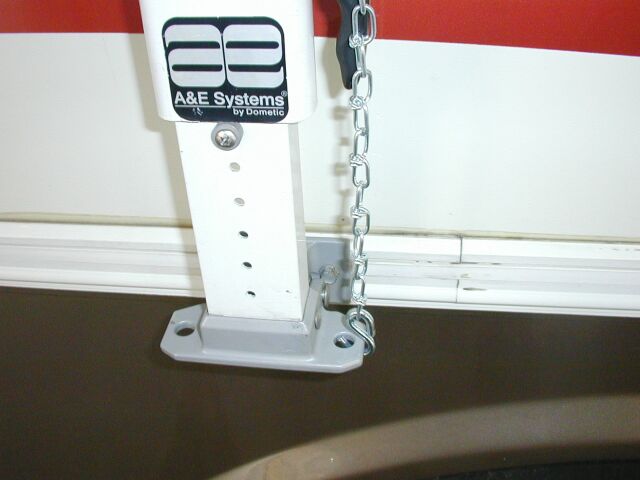
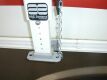 To
hook the bottom S hook to the rafter foot, pull down on the spring with
the awning rod as shown in the first picture. I have found that
selecting
a chain length that results in pulling the spring so that is about half
compressed seems to very firmly lock the awning in the closed
position.
As a test, if you unlock the factory front travel lock and try to open
the awning now, the spring absorbs the shock and the awning will not
open.
I think the spring is a good idea to prevent undue strain on the system
in the event the front lock fails. This is really a very simple
modification
to perform and the total price is around $15.00!
To
hook the bottom S hook to the rafter foot, pull down on the spring with
the awning rod as shown in the first picture. I have found that
selecting
a chain length that results in pulling the spring so that is about half
compressed seems to very firmly lock the awning in the closed
position.
As a test, if you unlock the factory front travel lock and try to open
the awning now, the spring absorbs the shock and the awning will not
open.
I think the spring is a good idea to prevent undue strain on the system
in the event the front lock fails. This is really a very simple
modification
to perform and the total price is around $15.00!
UPDATE: I later added clear vinyl tubing over the chain
to prevent marring of the arms from the chain vibrating in the wind
while
going down the highway. In addition, I added a second lock to the
front of the awning. I think one is probably fine but then two
has
got to be better. Better safe than sorry in my book!
My WebCounter says you
are
visitor number  since August 12, 2002.
Get your free web page hit counter at 
E-mail me at ultrasport(REMOVE)@mail.com
© Copyright 2002, 2003, 2004 Steve Das
HOME
 There
are two things that prevent the A&E awning from unrolling and
billowing
out while going down the highway. The primary thing is the
factory
locking pawl that is located in the right end cap of the awning.
It is my understanding that A&E has redesigned this locking
mechanism
but on the earlier awnings, this consists of an aluminum disk mounted
to
the center shaft of the awning with depressions around its perimeter
and
a pawl that engages those depressions. The other thing that
prevents
the awning from unrolling is the tension on the springs located in both
ends of the awning tube. Notice that the arms being locked
against
the rig will in no way prevent the awning from unrolling in the
wind!
The awning WILL still unroll with the arms locked tight against the
rig! If your locking pawl is not working properly, all of the
parts to repair it used to be available very inexpensively from www.marksrv.com
He might still have some in stock but you might end up having to
convert
to the new mechanism. I have not seen the new locking mechanism
so
I can't comment if that is better or not but I am told the new
mechanism
will replace the old. Again, Mark's RV would be the one I would
ask.
It would take a while to convince me that I still didn't need the lock
described below.
There
are two things that prevent the A&E awning from unrolling and
billowing
out while going down the highway. The primary thing is the
factory
locking pawl that is located in the right end cap of the awning.
It is my understanding that A&E has redesigned this locking
mechanism
but on the earlier awnings, this consists of an aluminum disk mounted
to
the center shaft of the awning with depressions around its perimeter
and
a pawl that engages those depressions. The other thing that
prevents
the awning from unrolling is the tension on the springs located in both
ends of the awning tube. Notice that the arms being locked
against
the rig will in no way prevent the awning from unrolling in the
wind!
The awning WILL still unroll with the arms locked tight against the
rig! If your locking pawl is not working properly, all of the
parts to repair it used to be available very inexpensively from www.marksrv.com
He might still have some in stock but you might end up having to
convert
to the new mechanism. I have not seen the new locking mechanism
so
I can't comment if that is better or not but I am told the new
mechanism
will replace the old. Again, Mark's RV would be the one I would
ask.
It would take a while to convince me that I still didn't need the lock
described below.